> ## Documentation Index
> Fetch the complete documentation index at: https://docs.checkoutrules.com/llms.txt
> Use this file to discover all available pages before exploring further.
# Quickstart
> This quickstart will guide you through creating a sample rule, demonstrating how it works, and how it can be used to customize your Shopify checkout.
## Create a sample rule
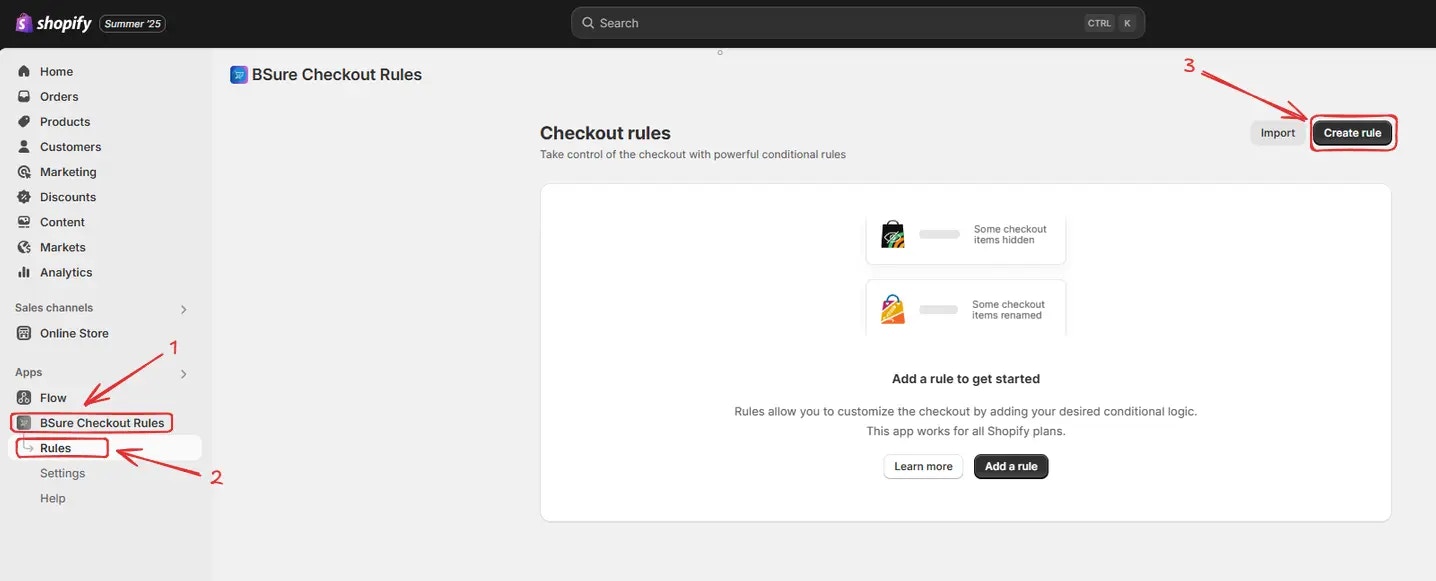
To create a rule, navigate to *BSure Checkout Rules → Rules → click "Create Rule"*.
You’ll then be redirected to the **Select checkout rule type** screen. Choose a category (Shipping, Payment, Validation, or Discount) → select checkout rule type (e.g., Reorder Shipping Methods) → click “Select Rule”.
Here we are selecting *Reorder Shipping Methods* as the checkout rule type for
demo purpose.
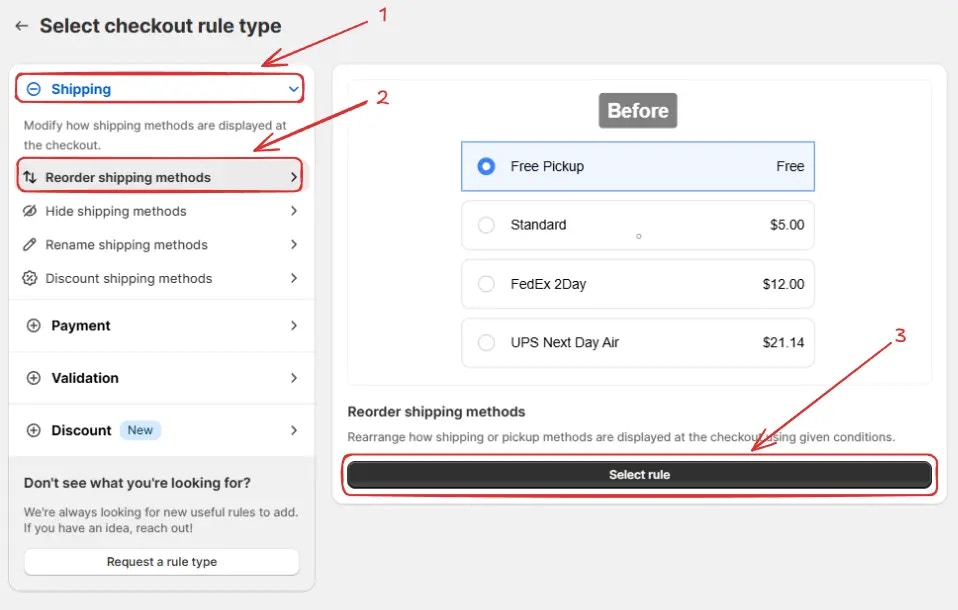
Then, a **template selection** popup will appear. Choose an option based on your
requirements. In most cases, you can choose the empty rule as a starting point and
modify it to your needs. Even if you choose a prefilled template, you will be able
to modify it later.
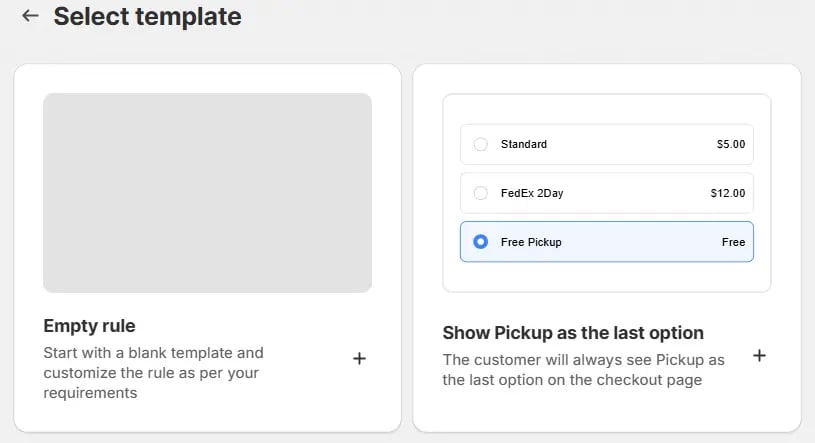
Next, you’ll land on the **Create new reorder shipping methods rule** screen, where you can configure your rule.
### Rule configuration
To configure the rule, first optionally we can add a name such as "Reorder Shipping Methods" to describe what it does. Then, select the status: Testing, Active, or Deactivated.
Here we are going to choose **Testing** status, so we can quickly test the rule without affecting the checkout for actual customers.
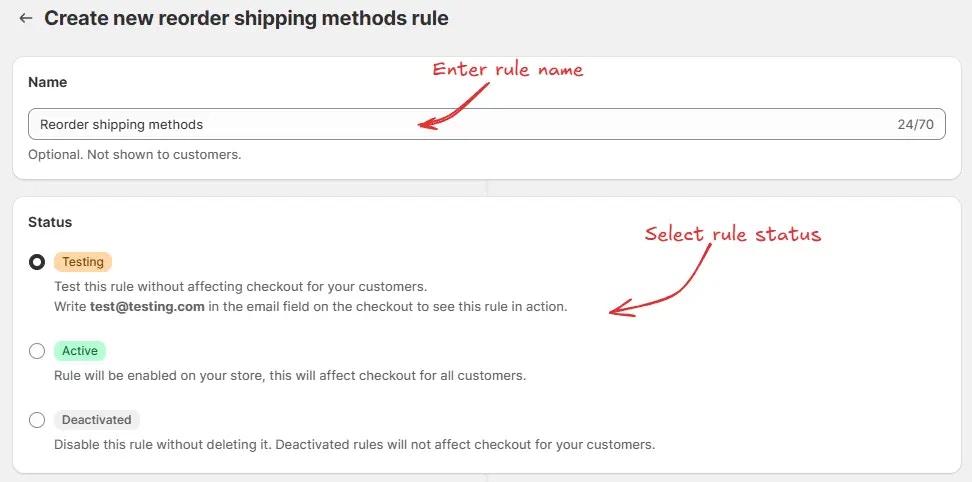
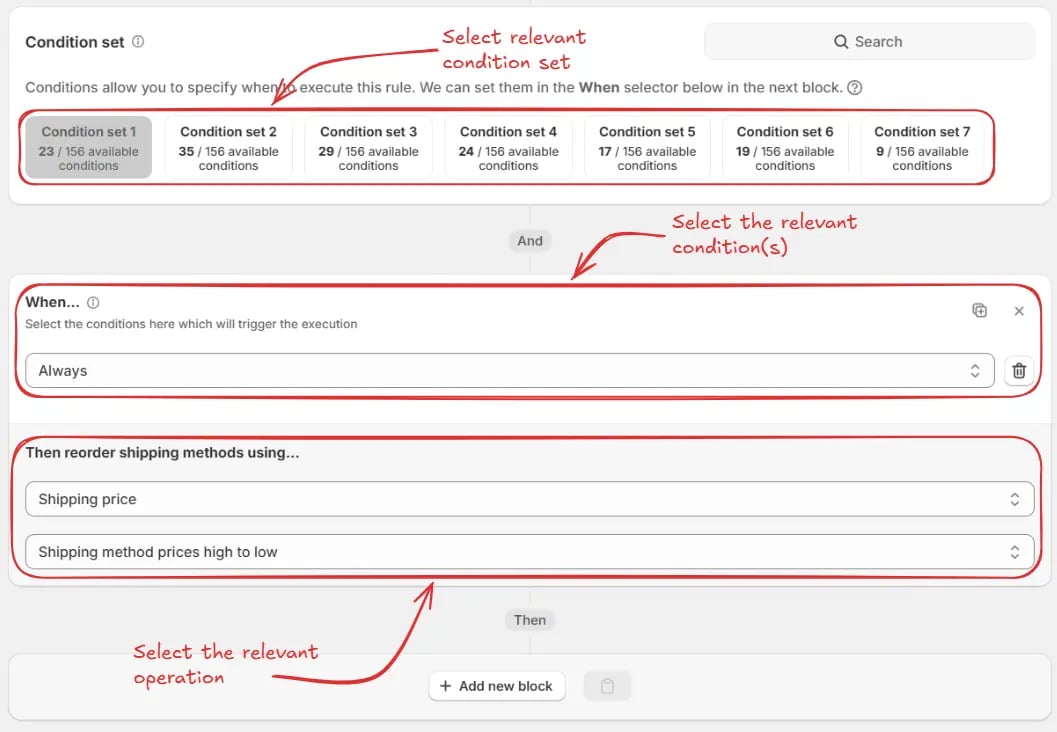
Next, on the same screen, select the relevant condition set, condition, and operation. As an example here we are going to choose the default condition set, then set the rule to always run, and select the operation to reorder the shipping methods from shipping prices highest to lowest.
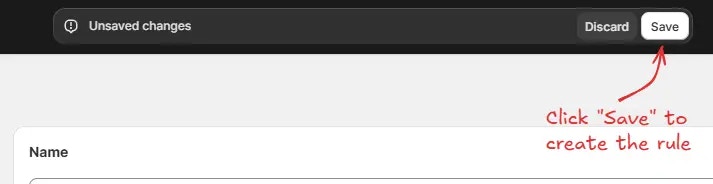
Finally, click the Save button at the top to create and save your rule.
## Test the rule
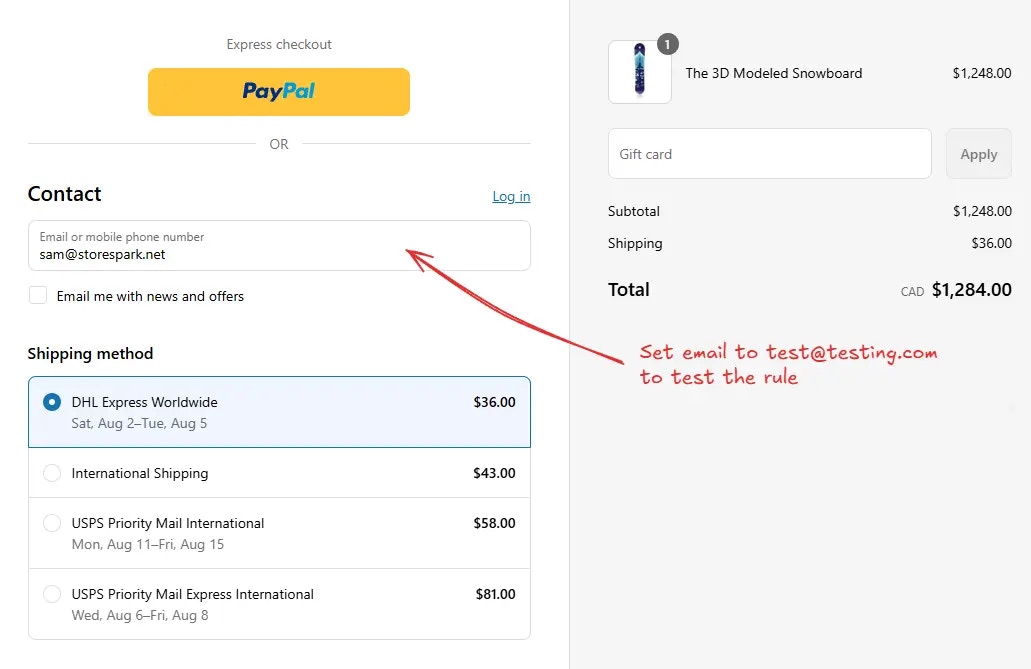
Since, the rule is set to testing status, we have to use `test@testing.com` as the email, instead of the actual email, to run the rule at checkout.
The image below shows the checkout page before the testing email
address was used. Please note the order of the shipping methods.
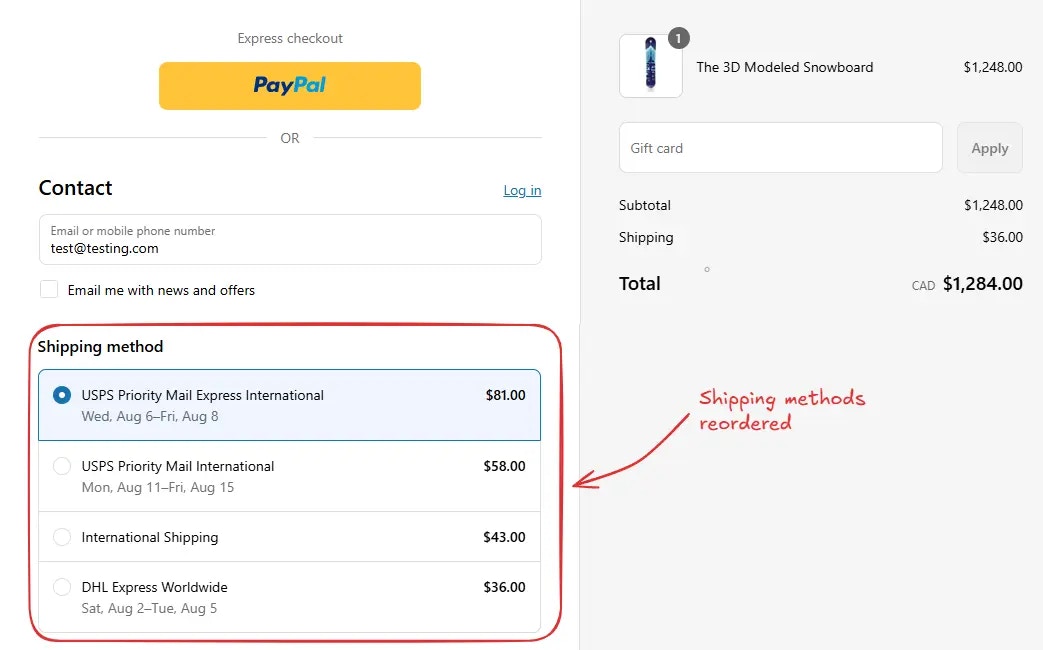
After using the testing email address, the checkout rule runs and you'll see the shipping methods are reordered. We can verify the most expensive shipping method is now at the top, as shown below.
## Activate the rule
Once testing is done, we can activate the rule, so it can start making changes to the checkout for actual customers. Only activated rules can make changes to the checkout for all customers.
Click on **Rules** in the sidebar to view all rules. Select the rule you want to activate, then click the **Activate** button to activate it.
Rule activation is only available on paid plans. If you haven't upgraded your
plan yet, follow the instructions
[here](/guides/en/get-started/installation#upgrade-your-plan) to upgrade.
Similarly, you can create multiple rules based on your requirements by following the process described above.
 You’ll then be redirected to the **Select checkout rule type** screen. Choose a category (Shipping, Payment, Validation, or Discount) → select checkout rule type (e.g., Reorder Shipping Methods) → click “Select Rule”.
 Then, a **template selection** popup will appear. Choose an option based on your
requirements. In most cases, you can choose the empty rule as a starting point and
modify it to your needs. Even if you choose a prefilled template, you will be able
to modify it later.
Then, a **template selection** popup will appear. Choose an option based on your
requirements. In most cases, you can choose the empty rule as a starting point and
modify it to your needs. Even if you choose a prefilled template, you will be able
to modify it later.
 Next, you’ll land on the **Create new reorder shipping methods rule** screen, where you can configure your rule.
### Rule configuration
To configure the rule, first optionally we can add a name such as "Reorder Shipping Methods" to describe what it does. Then, select the status: Testing, Active, or Deactivated.
Here we are going to choose **Testing** status, so we can quickly test the rule without affecting the checkout for actual customers.
Next, you’ll land on the **Create new reorder shipping methods rule** screen, where you can configure your rule.
### Rule configuration
To configure the rule, first optionally we can add a name such as "Reorder Shipping Methods" to describe what it does. Then, select the status: Testing, Active, or Deactivated.
Here we are going to choose **Testing** status, so we can quickly test the rule without affecting the checkout for actual customers.
 Next, on the same screen, select the relevant condition set, condition, and operation. As an example here we are going to choose the default condition set, then set the rule to always run, and select the operation to reorder the shipping methods from shipping prices highest to lowest.
 Finally, click the Save button at the top to create and save your rule.
 ## Test the rule
Since, the rule is set to testing status, we have to use `test@testing.com` as the email, instead of the actual email, to run the rule at checkout.
## Test the rule
Since, the rule is set to testing status, we have to use `test@testing.com` as the email, instead of the actual email, to run the rule at checkout.
 After using the testing email address, the checkout rule runs and you'll see the shipping methods are reordered. We can verify the most expensive shipping method is now at the top, as shown below.
 ## Activate the rule
Once testing is done, we can activate the rule, so it can start making changes to the checkout for actual customers. Only activated rules can make changes to the checkout for all customers.
Click on **Rules** in the sidebar to view all rules. Select the rule you want to activate, then click the **Activate** button to activate it.
## Activate the rule
Once testing is done, we can activate the rule, so it can start making changes to the checkout for actual customers. Only activated rules can make changes to the checkout for all customers.
Click on **Rules** in the sidebar to view all rules. Select the rule you want to activate, then click the **Activate** button to activate it.
 Similarly, you can create multiple rules based on your requirements by following the process described above.