> ## Documentation Index
> Fetch the complete documentation index at: https://docs.checkoutrules.com/llms.txt
> Use this file to discover all available pages before exploring further.
# 快速开始
> 本快速开始将指导您创建一个示例规则,演示其工作方式,以及如何用它来自定义您的 Shopify 结账流程。
## 创建示例规则
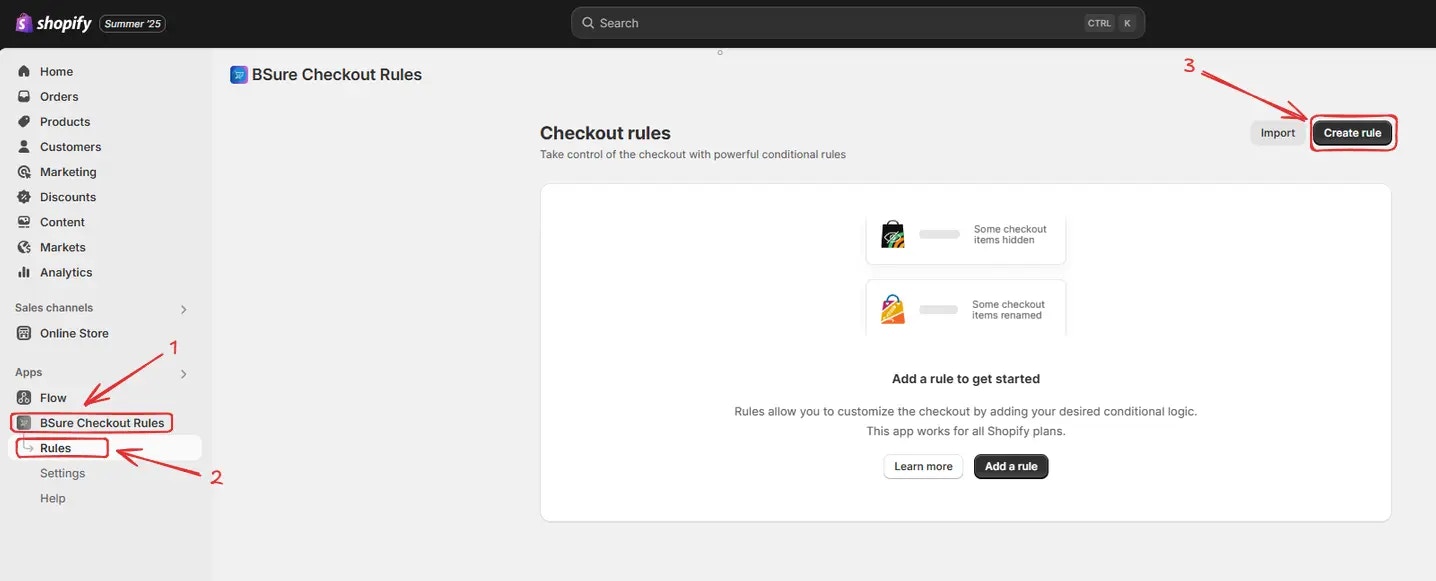
要创建规则,请导航到 *BSure Checkout Rules → 规则 → 点击“创建规则”*。
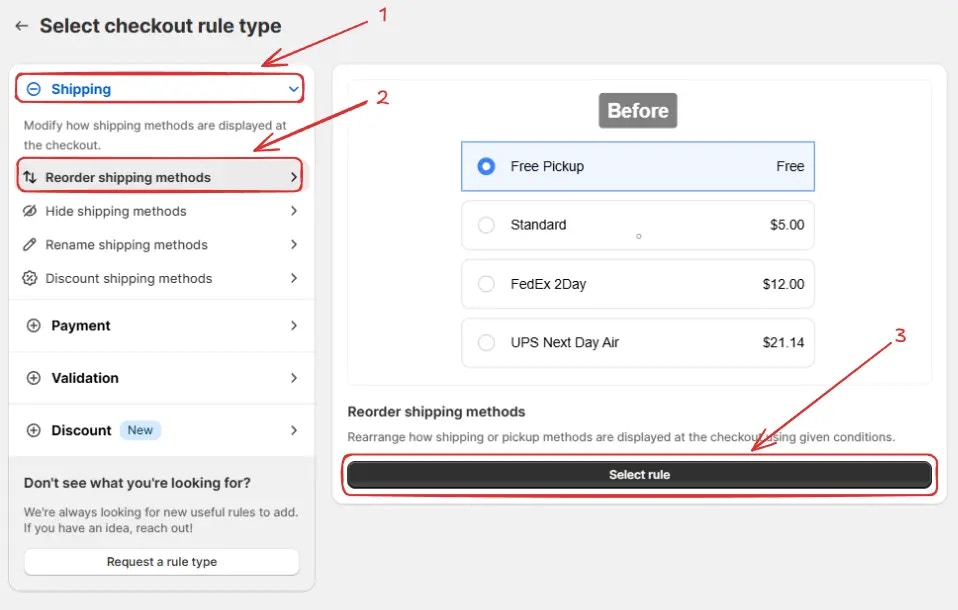
 然后您将被重定向到 **选择结账规则类型** 页面。选择一个类别(配送、支付、验证或折扣) → 选择结账规则类型(例如,重新排序配送方式) → 点击“选择规则”。
这里我们选择 *重新排序配送方式* 作为演示用的结账规则类型。
然后您将被重定向到 **选择结账规则类型** 页面。选择一个类别(配送、支付、验证或折扣) → 选择结账规则类型(例如,重新排序配送方式) → 点击“选择规则”。
这里我们选择 *重新排序配送方式* 作为演示用的结账规则类型。
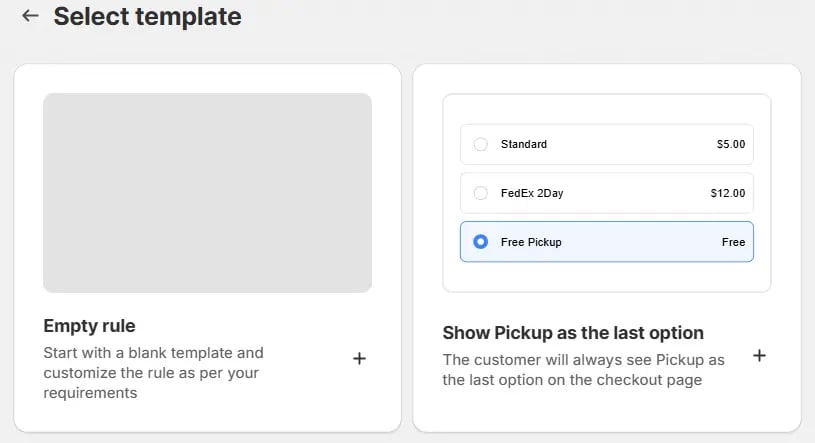
 接着会出现一个 **模板选择** 弹窗。根据您的需求选择一个选项。在大多数情况下,您可以选择空白规则作为起点,并根据需要进行修改。即使您选择了预填充模板,之后也可以进行修改。
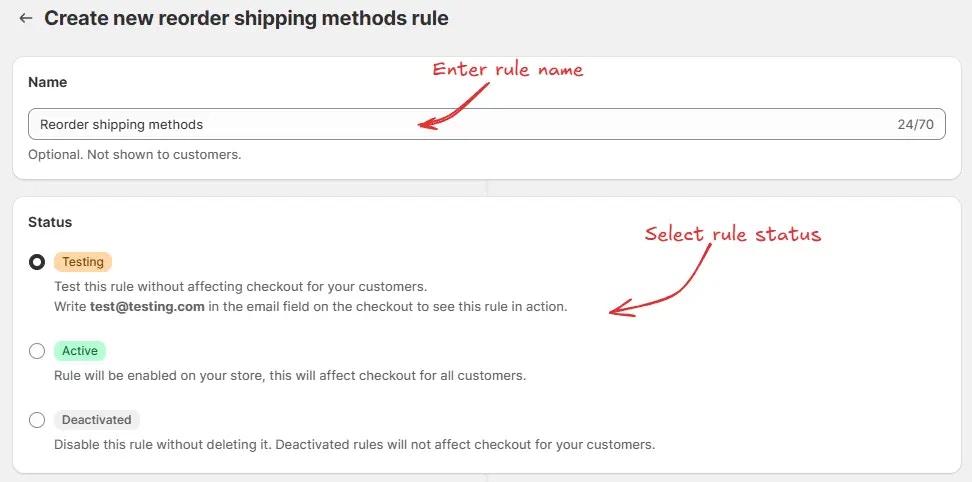
 接下来,您将进入 **创建新的重新排序配送方式规则** 页面,在这里您可以配置规则。
### 规则配置
要配置规则,首先可以选择性地添加一个名称,例如“重新排序配送方式”,用于描述该规则的作用。然后选择地位:测试、激活或停用。
在这里我们将选择 **测试** 地位,这样我们可以快速测试该规则,而不会影响真实客户的结账。
接下来,您将进入 **创建新的重新排序配送方式规则** 页面,在这里您可以配置规则。
### 规则配置
要配置规则,首先可以选择性地添加一个名称,例如“重新排序配送方式”,用于描述该规则的作用。然后选择地位:测试、激活或停用。
在这里我们将选择 **测试** 地位,这样我们可以快速测试该规则,而不会影响真实客户的结账。
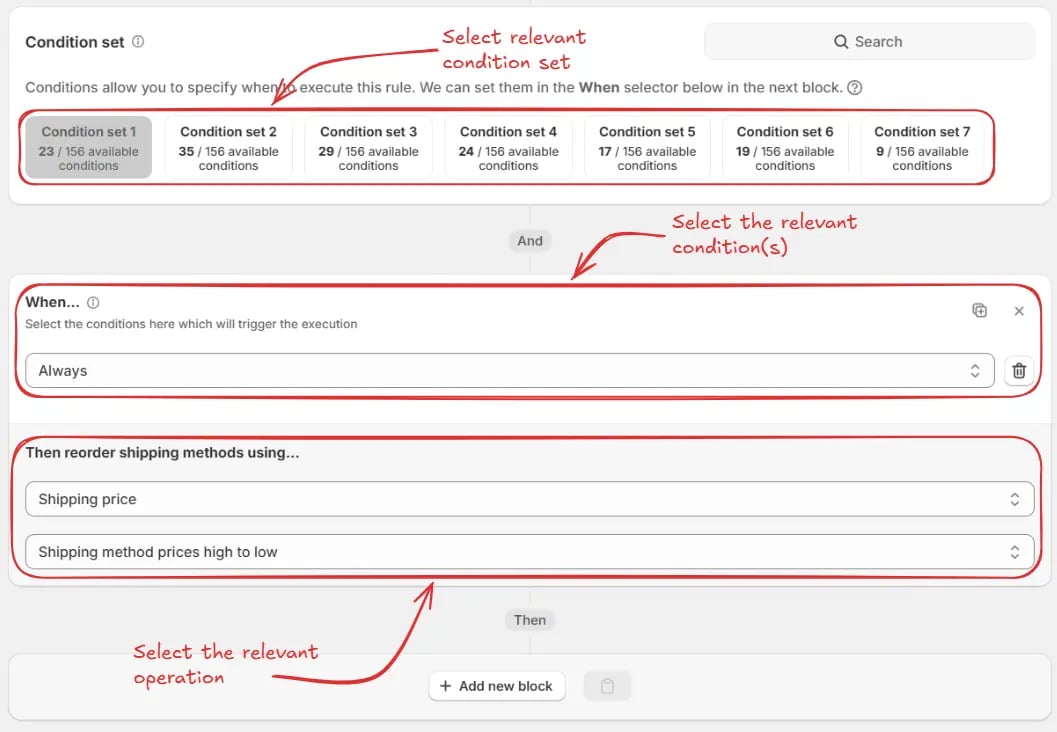
 接着在同一页面,选择相关的条件集、条件和操作。作为示例,我们将选择默认条件集,然后设置规则为始终运行,并选择操作为将配送方式按运费从高到低重新排序。
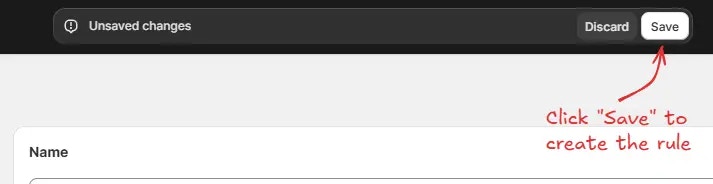
 最后,点击顶部的 保存 按钮来创建并保存规则。
 ## 测试规则
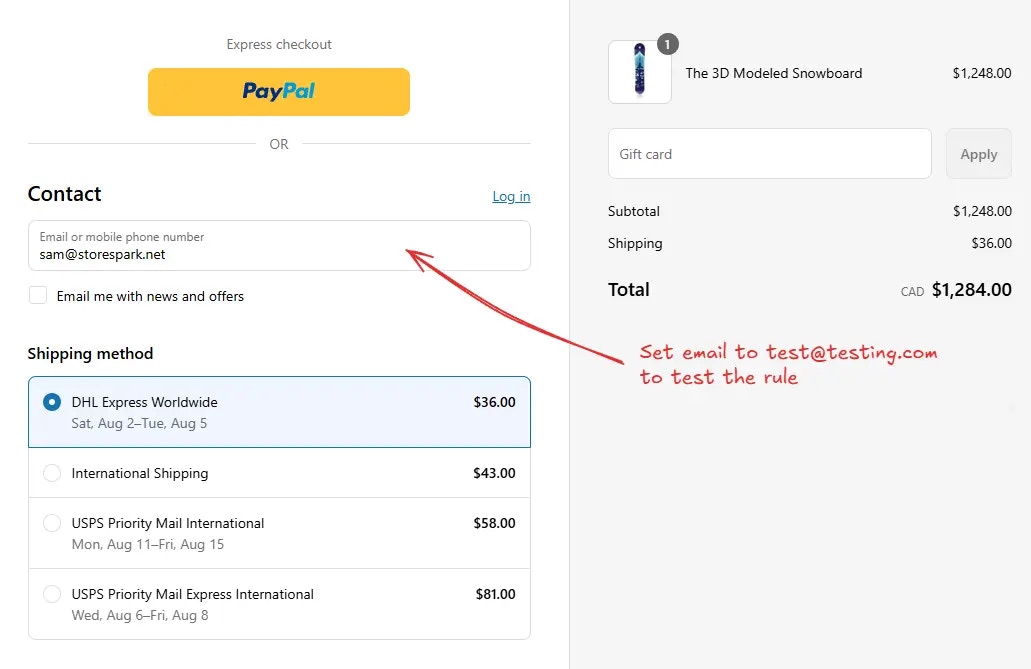
由于该规则被设置为测试地位,我们必须使用 `test@testing.com` 作为邮箱,而不是实际邮箱,才能在结账时运行该规则。
下图展示了在使用测试邮箱地址之前的结账页面。请注意配送方式的顺序。
## 测试规则
由于该规则被设置为测试地位,我们必须使用 `test@testing.com` 作为邮箱,而不是实际邮箱,才能在结账时运行该规则。
下图展示了在使用测试邮箱地址之前的结账页面。请注意配送方式的顺序。
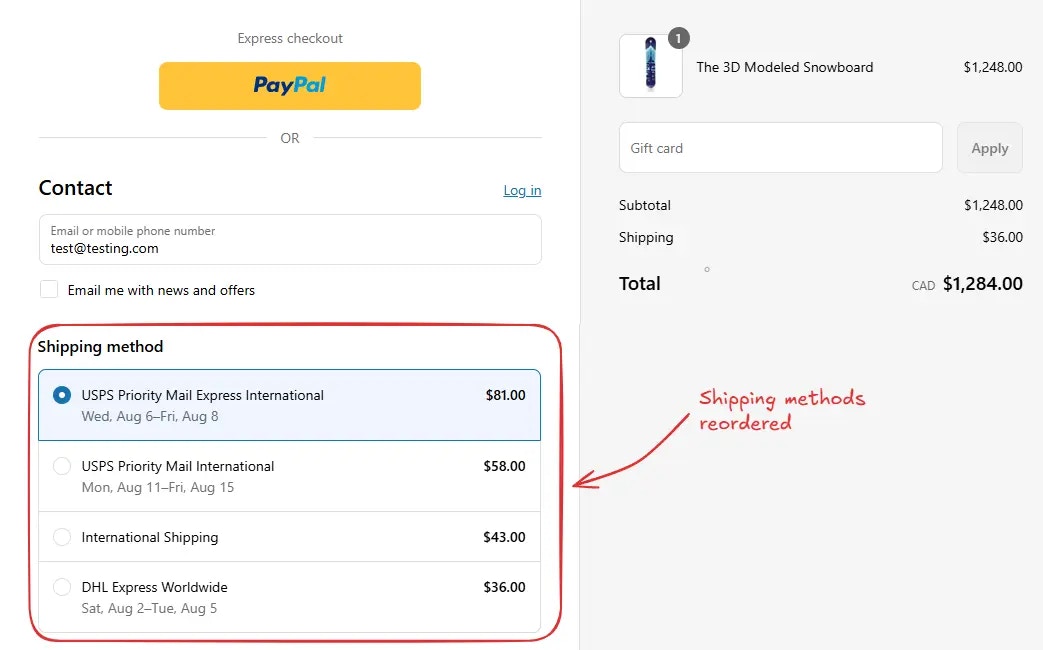
 使用测试邮箱地址后,结账规则会运行,您会看到配送方式被重新排序。我们可以验证最贵的配送方式现在位于顶部,如下图所示。
 ## 激活规则
完成测试后,我们可以激活该规则,使其开始对真实客户的结账流程生效。只有激活的规则才能对所有客户的结账进行更改。
点击侧边栏中的 **规则** 查看所有规则。选择您要激活的规则,然后点击 **激活** 按钮来启用它。
规则激活仅适用于付费方案。如果您尚未升级,请按照
[此处](/guides/zh/get-started/installation#升级您的套餐) 的说明进行升级。
## 激活规则
完成测试后,我们可以激活该规则,使其开始对真实客户的结账流程生效。只有激活的规则才能对所有客户的结账进行更改。
点击侧边栏中的 **规则** 查看所有规则。选择您要激活的规则,然后点击 **激活** 按钮来启用它。
规则激活仅适用于付费方案。如果您尚未升级,请按照
[此处](/guides/zh/get-started/installation#升级您的套餐) 的说明进行升级。
 同样,您可以根据需求按照上述流程创建多个规则。