Payment
Hide express checkout options
Hide express checkout payment options at the top of the checkout page.
Rule overview
This rule allows you to hide express checkout buttons such as PayPal, Apple Pay, Google Pay, or Shop Pay at the top of the checkout page based on given conditions.You can always hide these express buttons, only if you are on
Shopify plus plan due to Shopify restrictions. If you are on any other Shopify
plan, then this rule will hide all express checkout buttons, only when the
shipping address is not filled in. When the shipping address is filled in,
then the express checkout buttons will become visible again. This mechanism
ensures that at least the customer will always input their shipping address.
Sample configuration
The following steps show how to create and configure a Hide Express Checkout Options rule using the app.Create a new rule
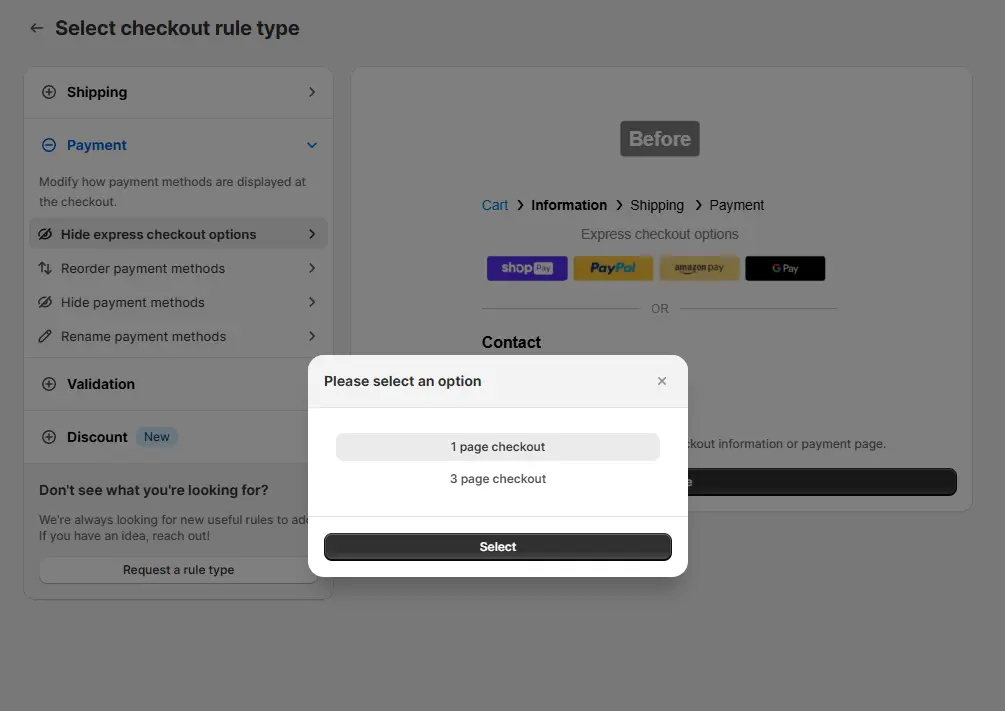
From your Shopify admin, open the app. In the sidebar, go to the Rules section and click “Create Rule”. Then, You’ll be redirected to the Select checkout rule type screen. Choose category “Payment” → select checkout rule type “Hide Express Checkout Options” → click “Select Rule”.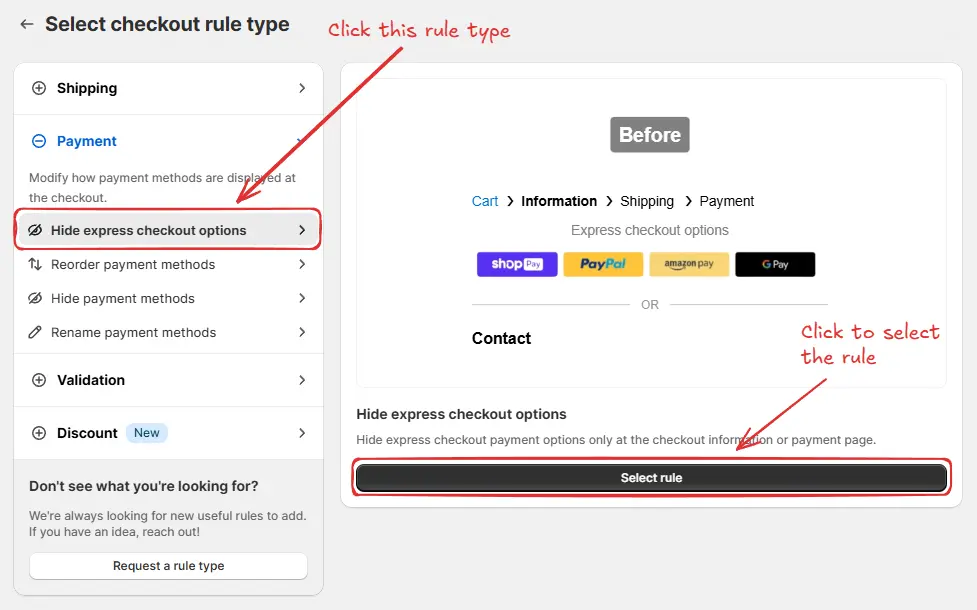 Then, a checkout layout selection popup will appear. Choose an option based on your store setup, either 1 page checkout or 3 page checkout. If you are using one page checkout on your store, then you should select 1 page checkout. If you are using 3 page checkout, then you should select 3 page checkout.
 Next, you’ll land on the Create new hide express checkout options rule screen, where you can configure your rule.
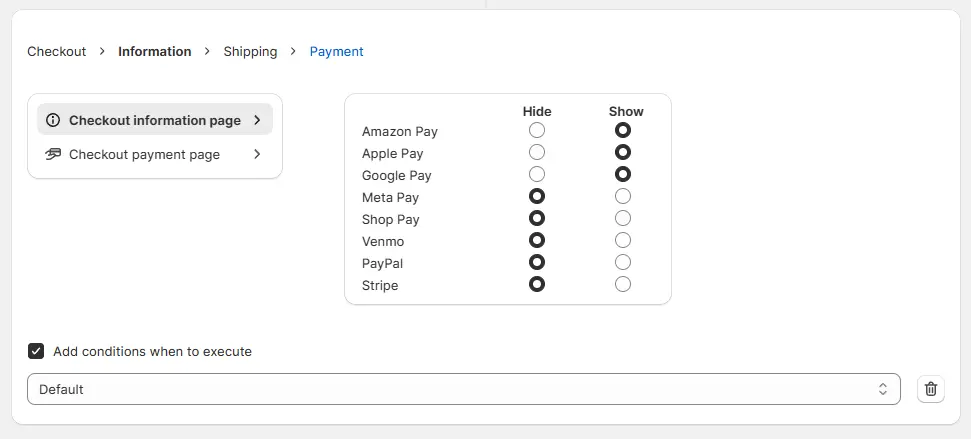
Rule configuration
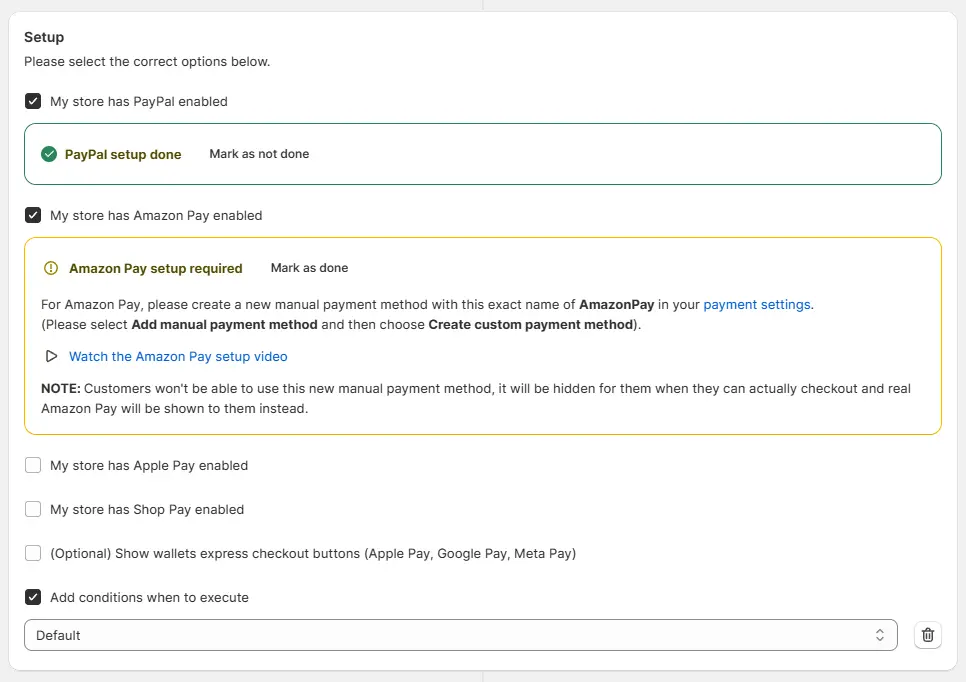
To configure the rule, first optionally we can add a name such as “Hide express checkout options” to describe what it does. Then, select the rule status: Testing, Active, or Deactivated. Here we are going to choose Testing status, so we can quickly test the rule without affecting the checkout for actual customers.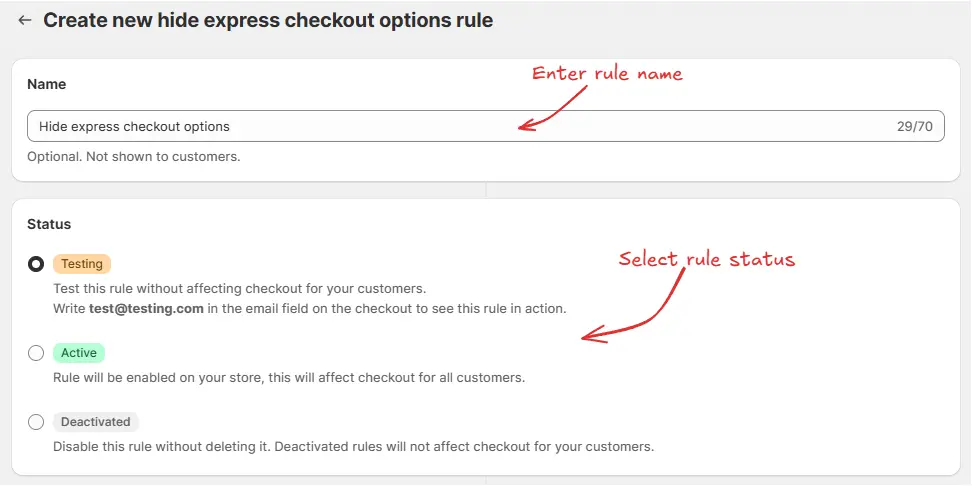 Next, if you selected 1 page checkout in the previous step, you will need to set up your payment methods as required in the rule setup. Click Mark as done for each method once you have followed the instructions to configure it. Optionally, you can add conditions if you want to control when the rule should execute.
You can watch the provided setup videos and follow along, if you are unsure
how to configure a manual payment method as required in the rule setup.
You only need to configure these manual payment methods, if you are not on
Shopify plus. If you are on Shopify plus, then there is no need to configure
these manual payment methods.
 Finally, click the Save button at the top to create and save your rule.

Test the rule
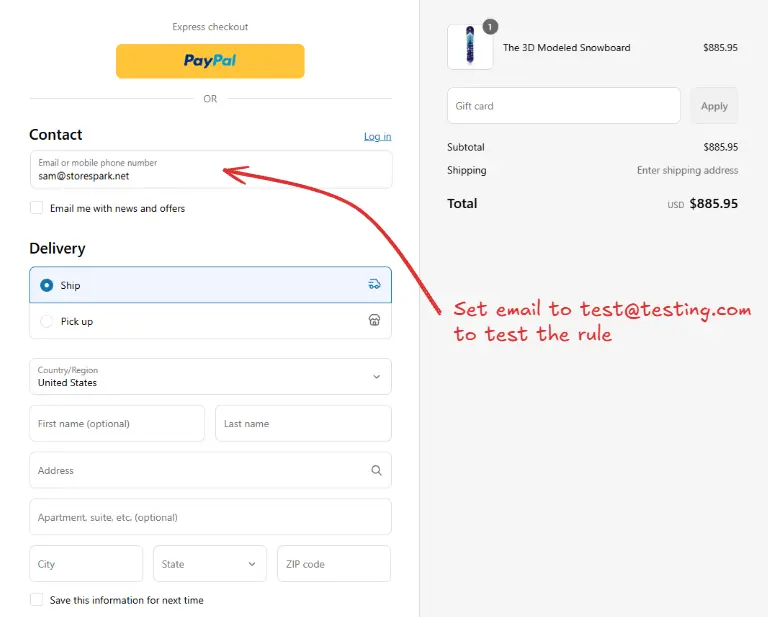
Since, the rule is set to testing status, we have to usetest@testing.com as the email, instead of the actual email, to run the rule at checkout.
The image below shows the checkout page before the testing email
address was used. Please note the PayPal express payment button is visible.
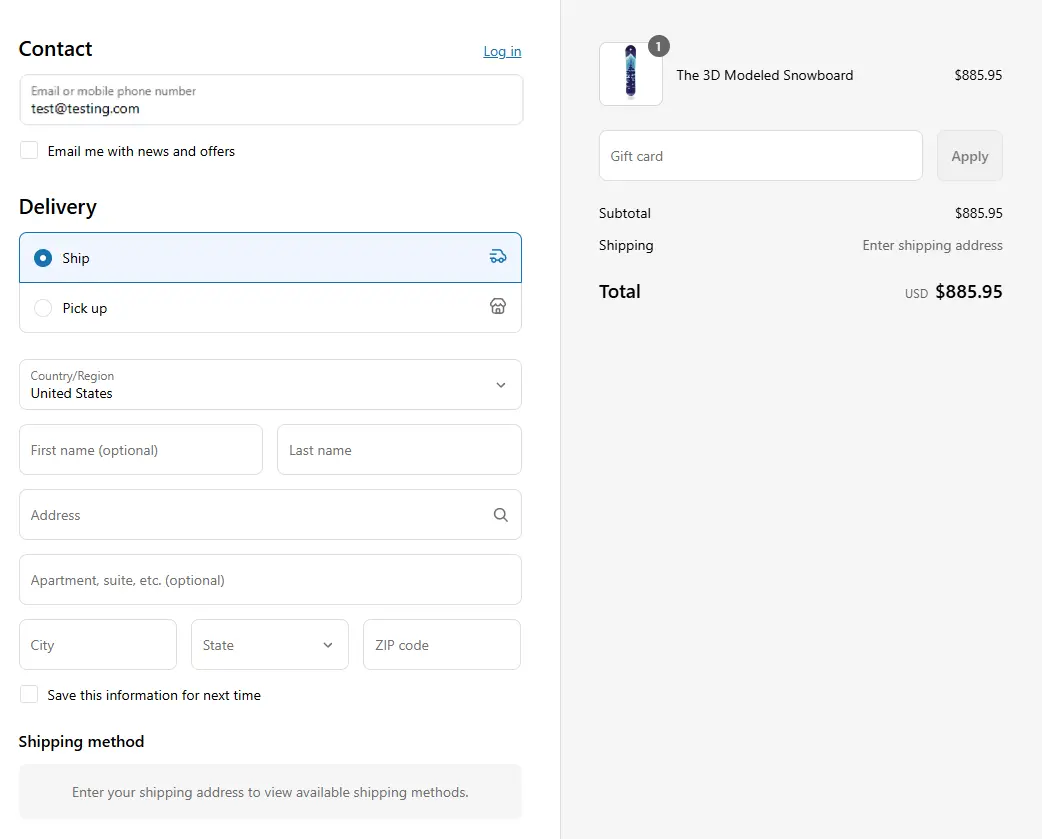
 After setting the email, the checkout rule runs and you’ll see the PayPal express payment button is hidden, as shown below.
Activate the rule
Once testing is done, we can activate the rule, so it can start making changes to the checkout for actual customers. Only activated rules can make changes to the checkout for all customers. Click on Rules in the sidebar to view all rules. Select the rule you want to activate, then click the Activate button to activate it.Rule activation is only available on paid plans. If you haven’t upgraded your
plan yet, follow the instructions
here to upgrade.
